I've recently built an open-source task management app in the "Getting Things Done" style.
When I came across the fantastic novel.sh WYSIWYG AI editor made by Steven Tey, I wanted to plug it into my app.
But there was a problem: novel was written as a website and unavailable as an installable npm package.
We still wanted to keep the website running, so the decision was to convert the project to a monorepo using turborepo.
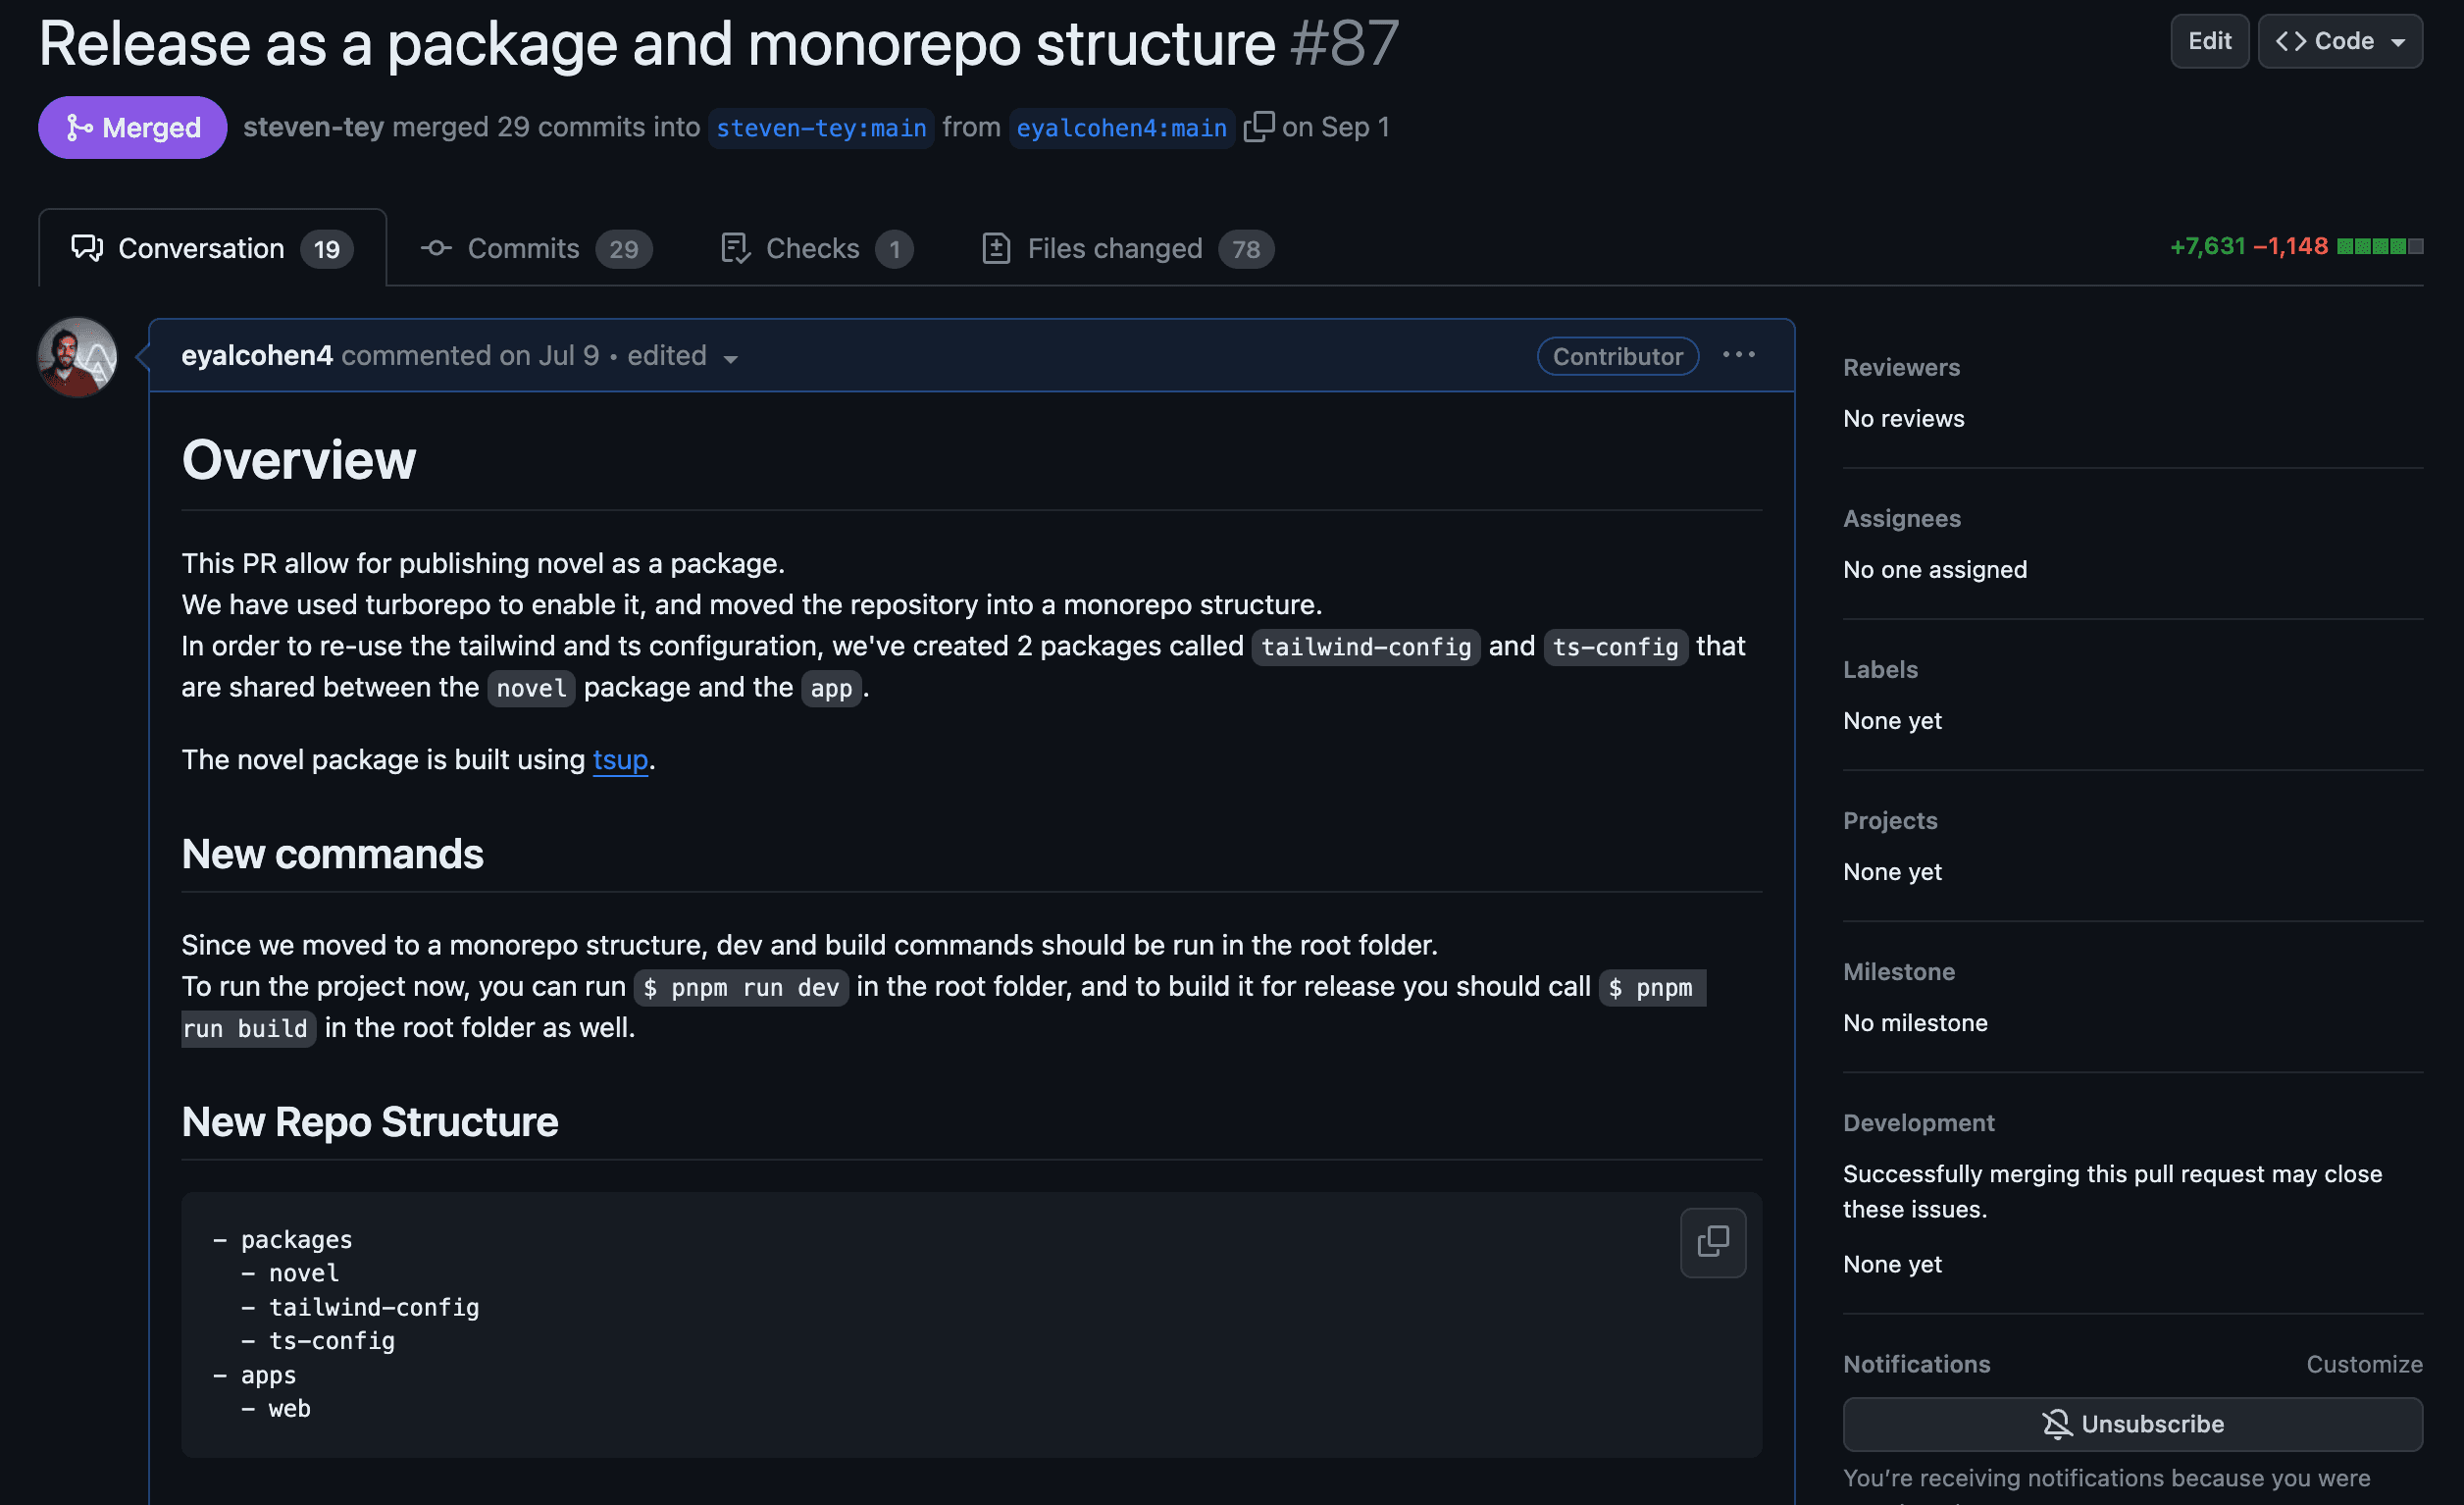
You can see the PR here. It's gigantic and includes 78 changed files.
Thanks to Steven's help, we got it out of the door.

What is turbo?
turbo is an incremental bundler and build system optimized for JavaScript and TypeScript, written in Rust.
It consists of 2 parts:
- Turborepo: A CLI tool that runs on your machine and is responsible for building your project.
- Turbopack: an incremental bundler (the successor to Webpack)
Jared Palmer, who is also the creator of Formik, built Turbo, and Vercel acquired it in 2021.
I've written this guide to help others convert their project into a mono repo.
The Goal
We aim to convert a single next.js project to a monorepo with two separate apps and a shared UI package that both will use. The use case we'll mimic is a simple website with two sides - A public-facing and a dashboard.
We will start with a single next.js project, and convert it to a monorepo with separate packages for shared components and logic between 2 apps. I love using the next-template by Shadcn for its simplicity. we will use it as a starting point.
You can also see the result in this repository, after we converted a single project to a monorepo.
Prerequisites
- Git installed locally
- Node.js installed locally
- A basic understanding of Next.js and React
Step 1: Creating the Project
We start by creating a new next.js application using the shadcn next-template:
$ npx create-next-app -e https://github.com/shadcn/next-templateLet's install a few components that will help us demonstrate our app:
$ npx shadcn-ui add dialog input labelAs we start, we have a single next.js project, with a single package.json file.
To demonstrate turborepo, and make sure our package is working, we'll add a simple SignIn component to our project.
It'll be used in both our website and dashboard apps.
Create a new file inside the components folder, sign-in.tsx.
Go ahead and paste this component inside it:
"use client"

import { Button } from "./ui/button"
import {
  Dialog,
  DialogContent,
  DialogDescription,
  DialogHeader,
  DialogTitle,
  DialogTrigger,
} from "./ui/dialog"
import { Input } from "./ui/input"
import { Label } from "./ui/label"

export const SignIn = () => {
  return (
    <Dialog>
      <DialogTrigger>
        <Button className="w-24" variant="destructive">
          Sign In
        </Button>
      </DialogTrigger>
      <DialogContent>
        <DialogHeader>
          <DialogTitle>Sign in to your account</DialogTitle>
          <DialogDescription>
            <p className="text-sm text-muted-foreground">
              Enter your details below.
            </p>
          </DialogDescription>
        </DialogHeader>
        <form className="grid gap-8">
          <div className="grid gap-4">
            <div className="grid gap-2">
              <Label htmlFor="email">Email</Label>
              <Input
                id="email"
                placeholder="name@example.com"
                type="email"
                autoCapitalize="none"
                autoComplete="none"
                autoCorrect="off"
              />
            </div>
            <div className="grid gap-2">
              <Label htmlFor="email">Password</Label>
              <Input
                id="email"
                type="password"
                autoCapitalize="none"
                autoComplete="none"
                autoCorrect="off"
              />
            </div>
          </div>
          <Button>Sign In with Email</Button>
        </form>
      </DialogContent>
    </Dialog>
  )
}
Now, let's render it inside the app. Replace app/page.tsx content with the following:
import { SignIn } from "@/components/sign-in"

export default function IndexPage() {
  return (
    <section className="container grid items-center gap-6 pb-8 pt-6 md:py-10">
      <SignIn />
    </section>
  )
}
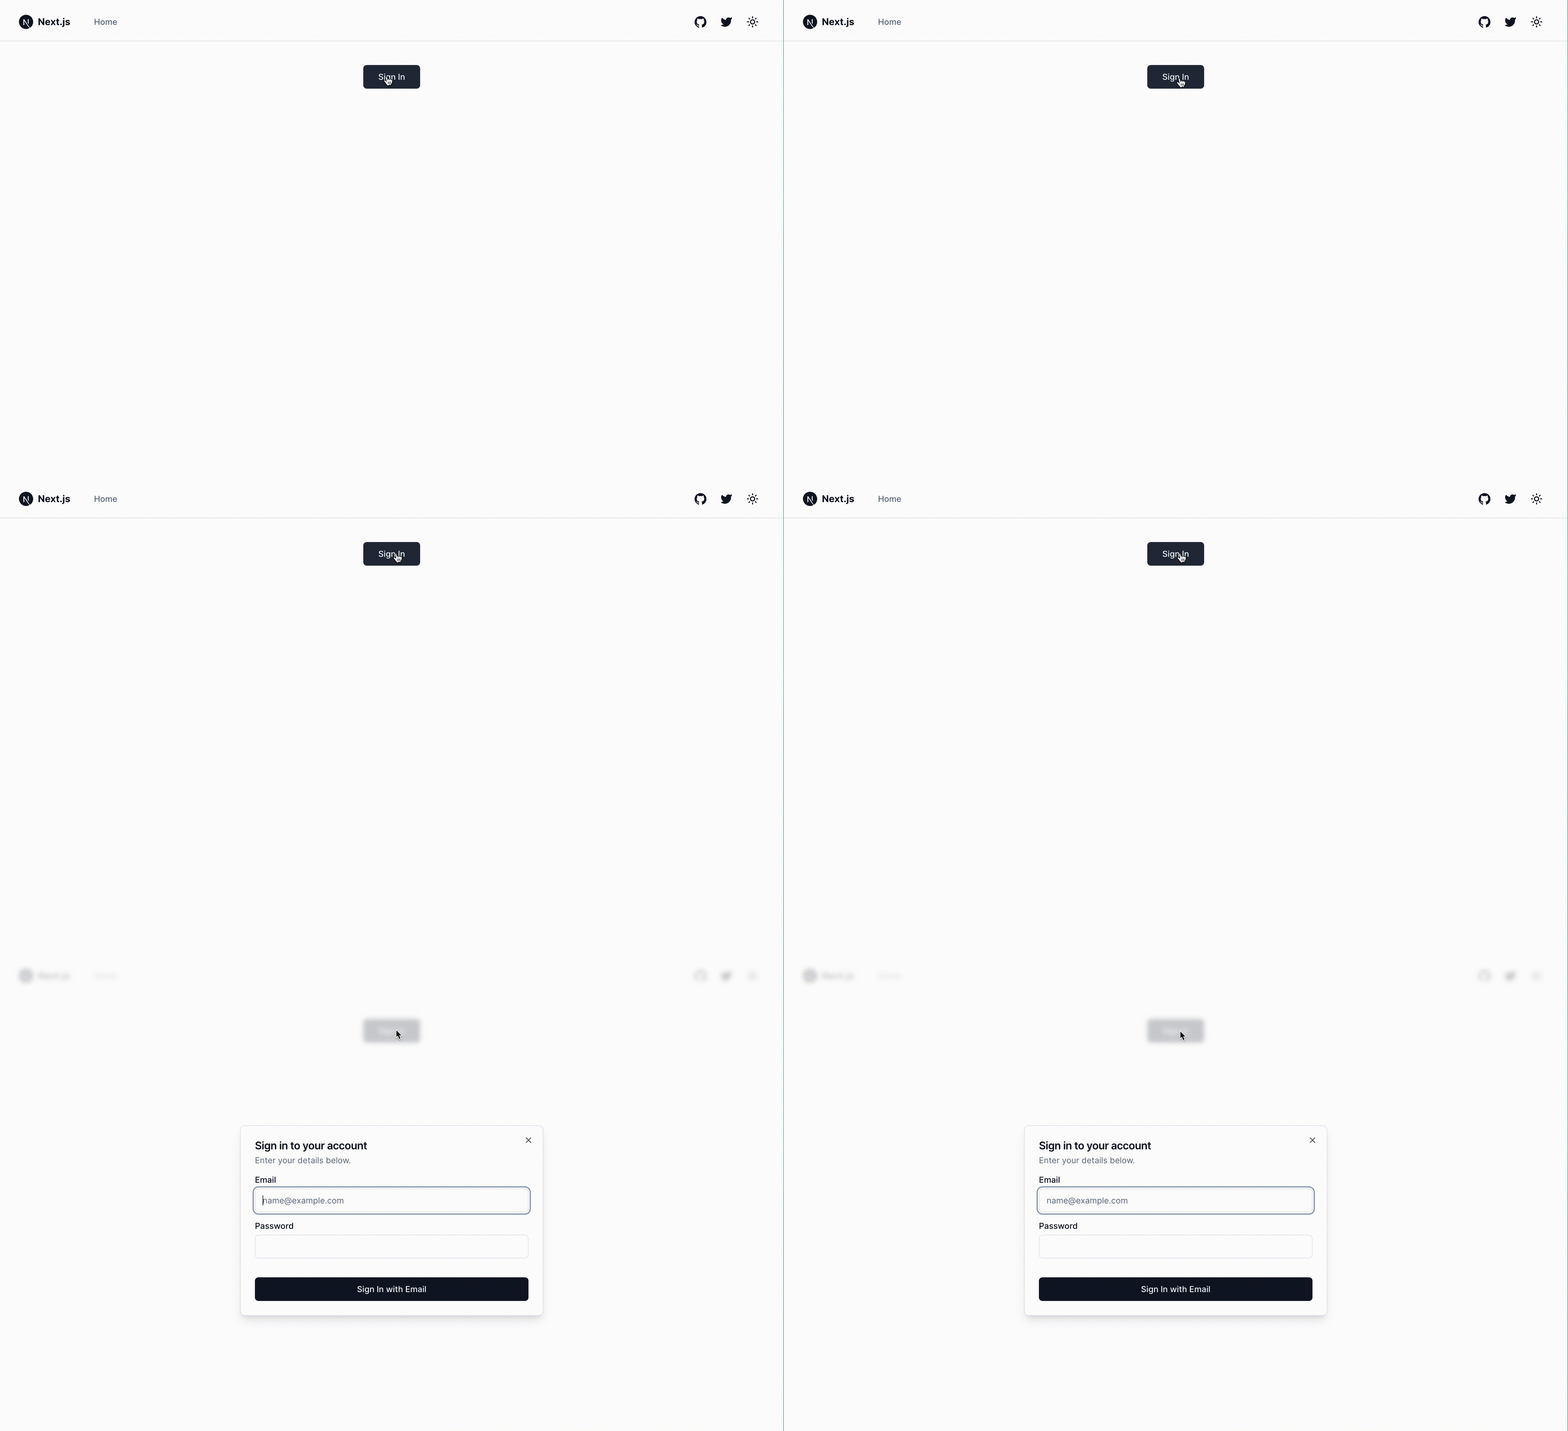
The sign-in button triggers a simple user authentication modal. It should look similar to this:

Run the project to verify it's working:
$ pnpm run dev
Step 2: Adding turborepo
To render the SignIn component in two different apps, we'd want to move it to a separate package.
That's where turborepo comes in.
We'll start by adding turborepo to our project.
$ pnpm add turbo --globalThe second step is to create a turbo.json file in the repository root folder:
{
  "$schema": "https://turbo.build/schema.json",
  "pipeline": {
    "build": {
      "outputs": [".next/**", "!.next/cache/**"]
    },
    "lint": {}
  }
}
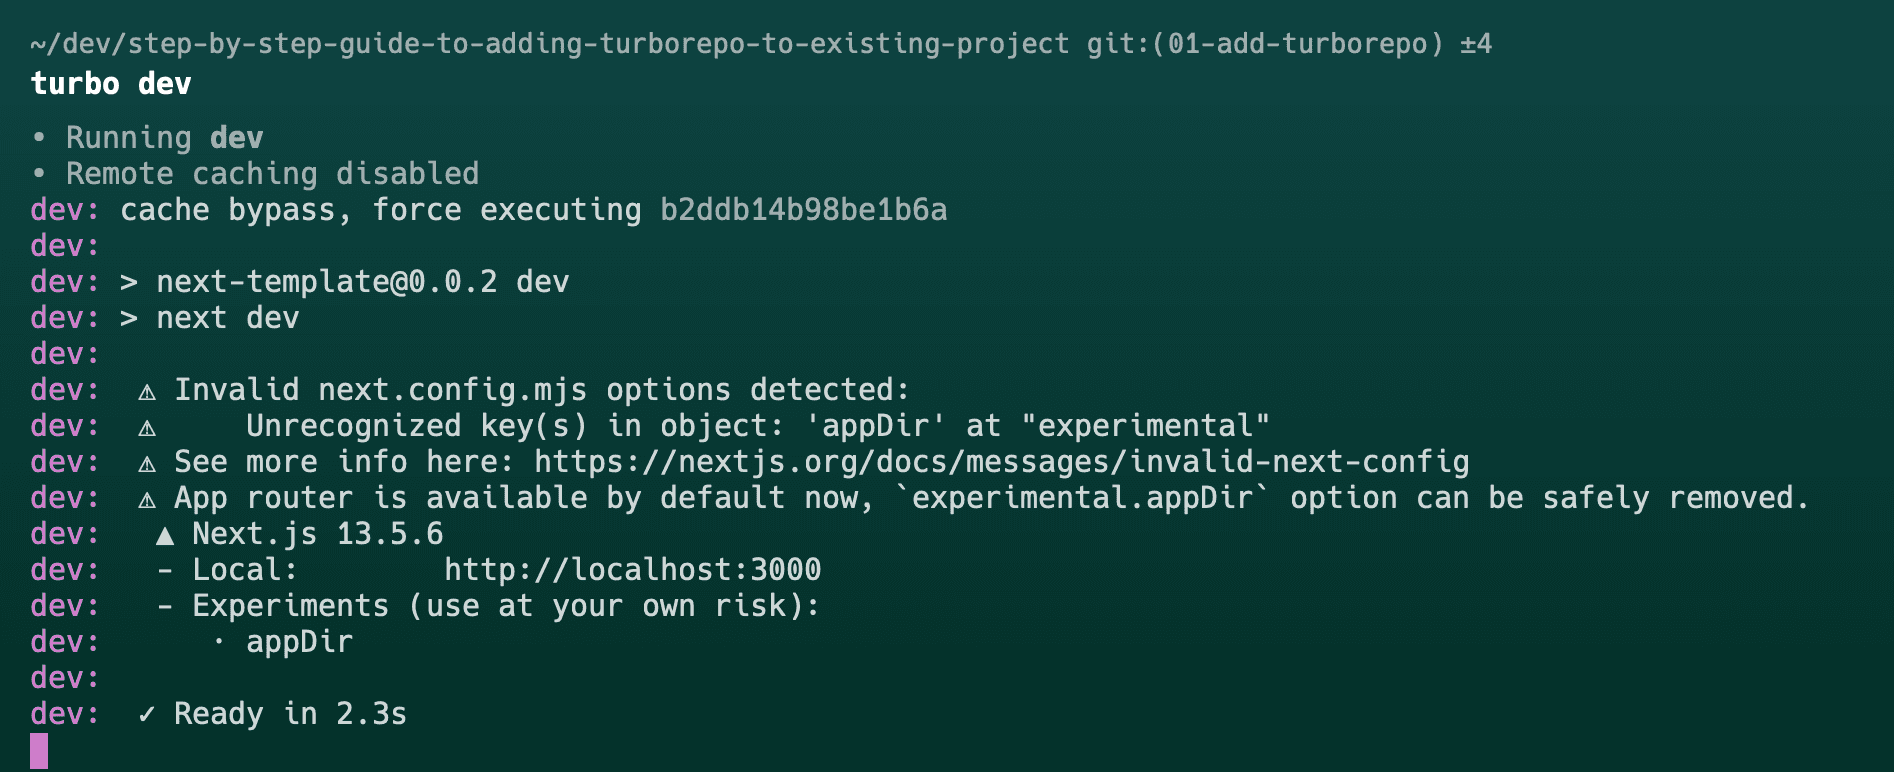
We can now run turbo dev instead to start our project.
$ turbo devIf everything was successful, you should see a similar output:

Step 3: Convert The Project to a monorepo
Now that we have turborepo setup, we can convert our project to a monorepo.
Under the hood, turborepo uses the workspaces feature package managers like pnpm and yarn.
Workspaces are the building blocks of your monorepo. Each app and package you add to your monorepo will be inside its own workspace. Turborepo Docs
We define workspaces through package.json or pnpm-workspace.yaml file.
Each workspace must have its package.json file inside as well.
A popular convention for monorepos is to create a packages folder for shared libraries, and a apps folder for apps.
That's customizable, but we'll follow it for this guide.
To convert our single project to a monorepo, we need three steps:
- Move our single app to an
appsfolder, where our web applications will be - Define our workspace by creating a
package.jsonin the root folder - Create a
packagesfolder. That's where we'll put our shared components and logic
1. Move our single app to the apps folder
Run the following commands in the root folder of our project:
# create the apps folder
$ mkdir -p ./apps/website

# move the content of our project to the website folder (including hidden files)
# this command may result in an error:.
# > mv: rename ./apps to ./apps/website/apps: Invalid argument
# That's fine, you can ignore it.
$ mv ./** ./.** ./apps/website

# Move back the .git folder, .gitignore and .turbo files
$ mv ./apps/website/.git ./apps/website/.gitignore ./apps/website/.turbo ./

# create the dashboard folder
$ mkdir -p ./apps/dashboard

# copy the content of our project to the dashboard folder
$ cp -r ./apps/website/ ./apps/dashboard
The current repo structure should look like this:
[--] apps
[----] dashboard
[----] website
The next step is to update the names of the apps in the workspace.
{
  "name": "dashboard",
  "version": "0.1.0",
  "private": true
}{
"name": "website",
"version": "0.1.0",
"private": true
}2. Create a package.json in the root folder
Create and add the following content to package.json in the project root folder
{
  "name": "the-best-monorepo",
  "version": "0.1.0",
  "private": true,
  "packageManager": "pnpm@6.14.1",
  "scripts": {
    "dev": "turbo dev"
  }
}
Now we'd need to add the workspaces config.
packages:
  - "apps/*"
  - "packages/*"
3. Create the packages folder
We'd now want to create the packages folder to put our shared components in. Run this command to create it:
$ mkdir -p packages/ui/componentsOur repo structure should look like this now:
[--] apps
[----] dashboard
[----] website
[--] packages
[----] ui
At the package/ui folder, go ahead and create a package.json file inside the package/ui, and add the following content:
{
  "name": "ui",
  "version": "0.1.0",
  "private": true
}
We've now created the monorepo structure.
Step 4: Create the UI Package Infrastructure
Let's create our UI package to share our SignIn component between our apps.
There are a few things we need to do:
- Move the
SignIncomponent to the UI package - Install dependencies and add build/dev scripts
- Add config files for typescript and tailwind
We'll start by copying the SignIn component to the UI package and the UI folder.
$ cp -r apps/website/components/sign-in.tsx apps/website/components/ui apps/website/lib/utils.ts ./packages/ui/componentsDependencies & Scripts
Web applications that will use our UI package must have React installed.
We can enforce it via the peerDependencies package.json property.
We'll also need some other dependencies from our website app, so we'll also migrate them to the UI package.
Add the following to the UI package.json:
$ pnpm add @radix-ui/react-dialog @radix-ui/react-label @radix-ui/react-slot tailwindcss class-variance-authority clsx lucide-react sharp tailwind-merge tailwindcss-animate
$ pnpm add -D tsup typescript postcss prettier eslint eslint-config-prettier eslint-plugin-tailwind eslint-plugin-react eslint-plugin-react-hooks autoprefixer @types/react
Now, we need to bundle the app using typescript and tailwind. For typescript, I love to use tsup, which is a zero-config bundler for typescript.
We now need to edit the UI package package.json file in 2 ways:
- Add build & dev scripts
- Add react as peerDependency: We need React as a `peerDependency, because we want to avoid bundling it with our package, as it's already bundled with our apps. Consuming apps must have it installed, and we'll get a warning if they don't.
Add the following to the ui package.json file:
{
  "scripts": {
    "build": "tsup",
    "dev": "tsup --watch"
  },
  "peerDependencies": {
    "react": "^18.x.x"
  }
}
Adding Config Files
To run typescript and tailwind, we must define our build configs to bundle our package.
The required tools are: tsup, typesscript, tailwind, and postcss.
Copy and paste the following files to the UI package:
import { Options, defineConfig } from "tsup"

export default defineConfig((options: Options) => ({
  entry: ["index.ts"],
  banner: {
    js: "'use client'",
  },
  format: ["cjs", "esm"],
  dts: true,
  clean: true,
  external: ["react"],
  injectStyle: true,
  ...options,
})){
"$schema": "https://json.schemastore.org/tsconfig",
"display": "Default",
"include": ["."],
"exclude": ["dist", "build", "node_modules"],
"compilerOptions": {
"composite": false,
"declaration": true,
"declarationMap": true,
"esModuleInterop": true,
"forceConsistentCasingInFileNames": true,
"inlineSources": false,
"isolatedModules": true,
"module": "ESNext",
"target": "ES6",
"jsx": "react-jsx",
"moduleResolution": "node",
"noUnusedLocals": false,
"noUnusedParameters": false,
"preserveWatchOutput": true,
"skipLibCheck": true,
"strict": true,
"paths": {
"@/*": ["./*"]
},
"baseUrl": "."
}
}/** @type {import('tailwindcss').Config} */
module.exports = {
content: [],
theme: {
extend: {},
},
plugins: [require("@tailwindcss/typography"), require("tailwindcss-animate")],
}module.exports = {
plugins: {
tailwindcss: {},
autoprefixer: {},
},
}There's one last thing we need to add for next.js 13 so it'll transpile the package for us.
Add the following line to apps/website/next.config.mjs and apps/dashboard/next.config.mjs:
transpilePackages: ["ui"],We're now ready to run the package and see it in action!
Step 5: Using The UI Package in the Apps
To use the SignIn component, we'll create a index.ts file to export it from the ui package.
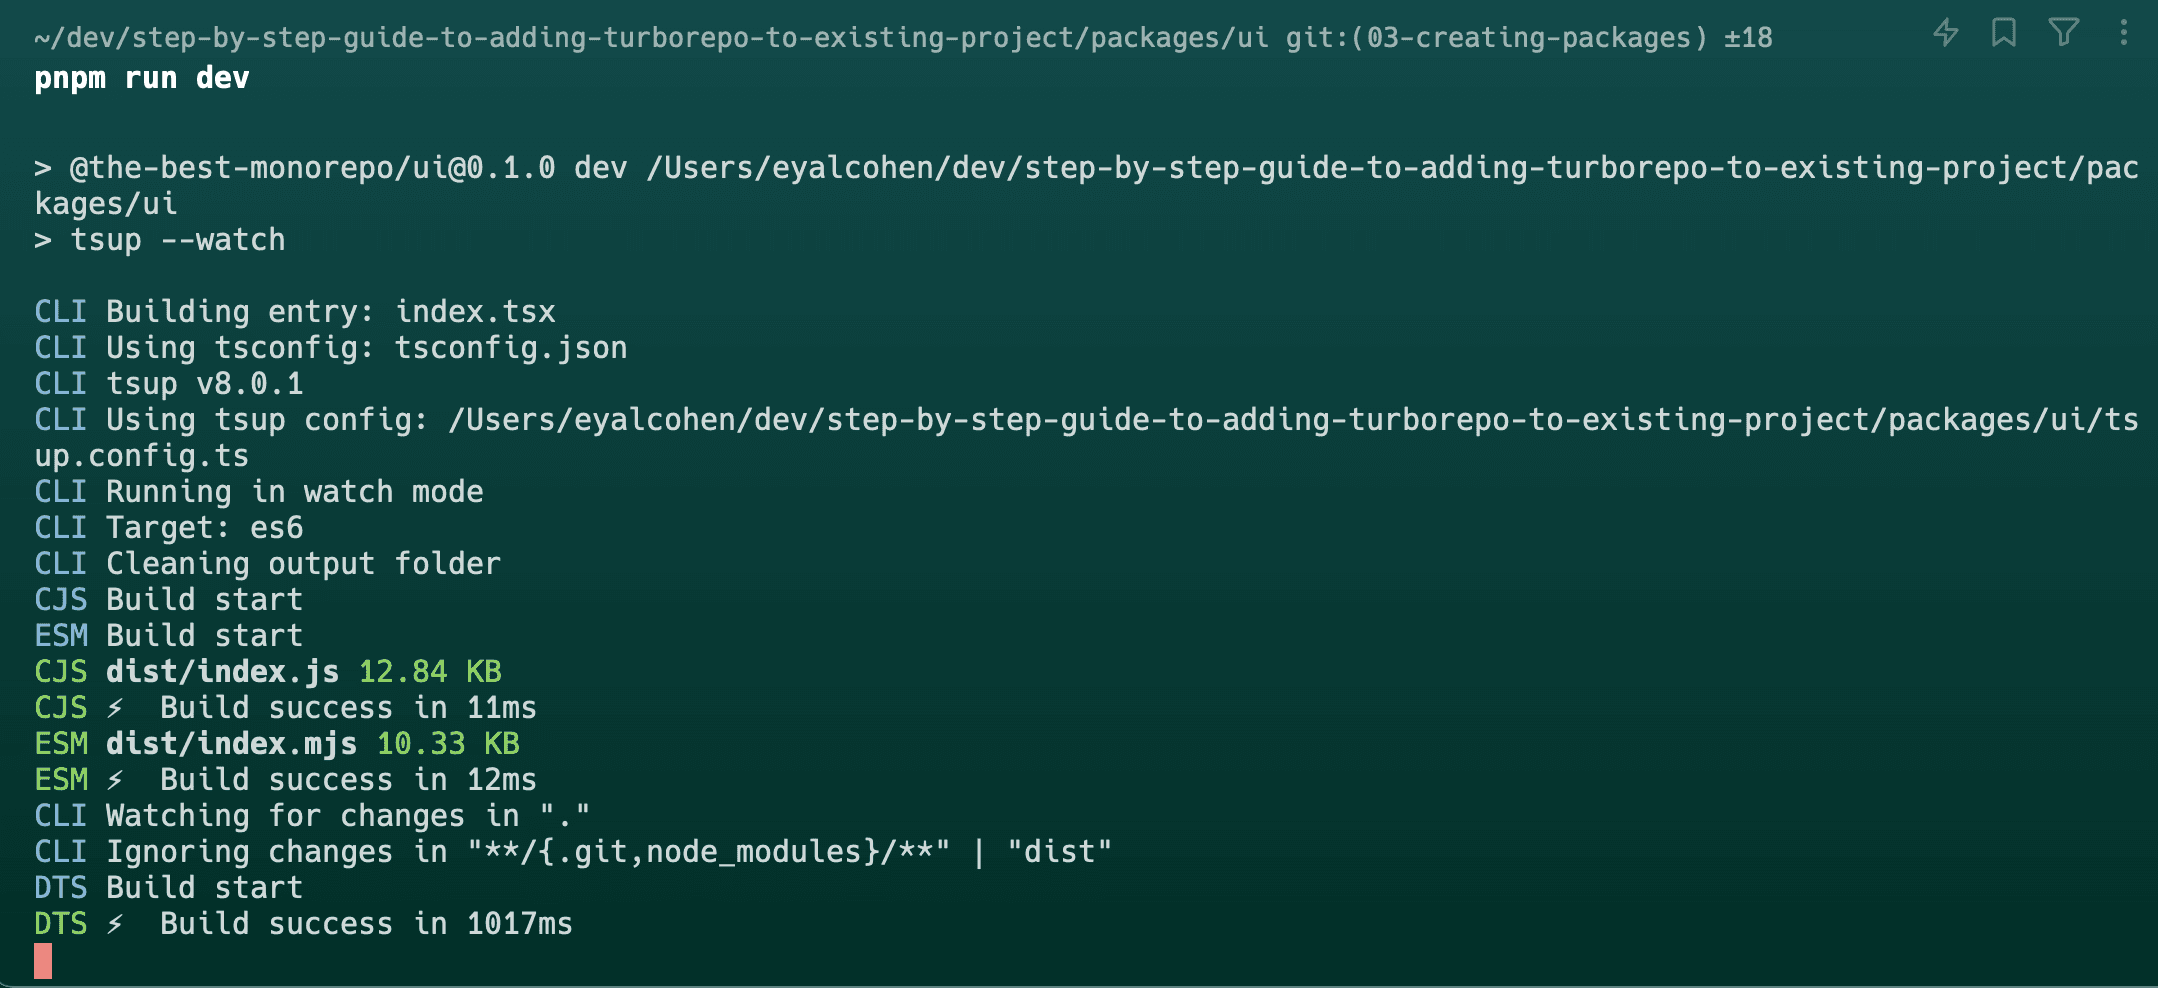
export { SignIn } from "./components/sign-in"Then, run the following command inside the packages/ui folder to build the package.
$ pnpm run buildYou should see a similar output:

We can now add the UI package to our website and dashboard apps.
In both apps, add the UI package as a dependency to the package.json files:
{
  "dependencies": {
    "ui": "workspace:*"
  }
}
Run pnpm install to install on both folders.
We can now replace the import of the SignIn component with the one in our UI package, and use it in our website app.
Inside apps/website/pages/index.tsx and apps/dashboard/pages/index.tsx, replace the import of the SignIn component with the following:
import { SignIn } from "ui"
You should now see the same sign-in button as before, but this time, it's coming from the UI package.
To ensure we are using the same SignIn component, we can change the button color and see it updated on both apps.
This is also the premise - save duplicates and coding time.
Go to packages/ui/components/sign-in.tsx, line 20, and change the button variant to destructive:
<Button className="w-24">Sign In</Button>The last step would be to rebuild the UI package. You can also re-build it on every change using pnpm run dev.
$ pnpm run devOpen 2 new terminals and run the two apps:
$ pnpm run dev$ pnpm run devThe changes will now be reflected on both apps:

You can change more stuff and see the changes on both apps.
Summary
We've now converted our single next.js project to a monorepo with two separate apps and shared packages for our UI components.
You can also publish the ui package to npm and use it in other projects outside the monorepo.
You can also create more shared packages and optimize your mono repo further - config, logic, and whatever makes sense to your company.
I hope you've enjoyed this guide and that it helped you understand how to convert your project to a mono repo.
The repository with the final result is available here.
If you have any questions, feel free to send them to me at eyal@coheneyal.com or on twitter.
